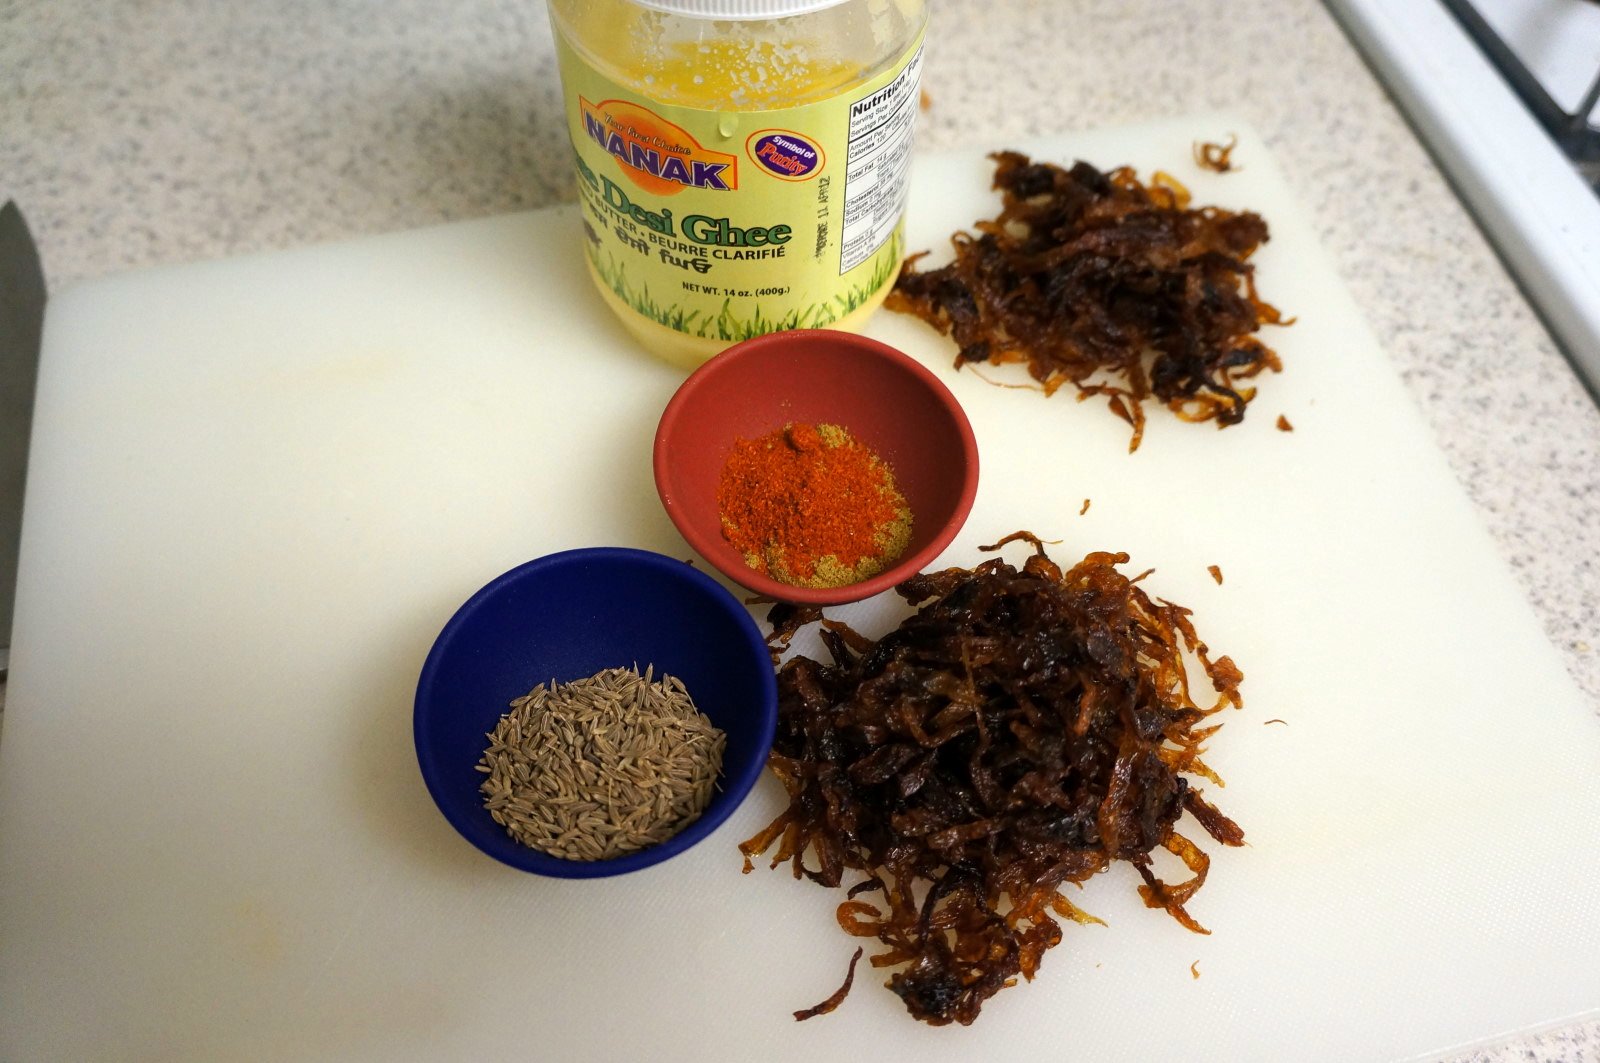
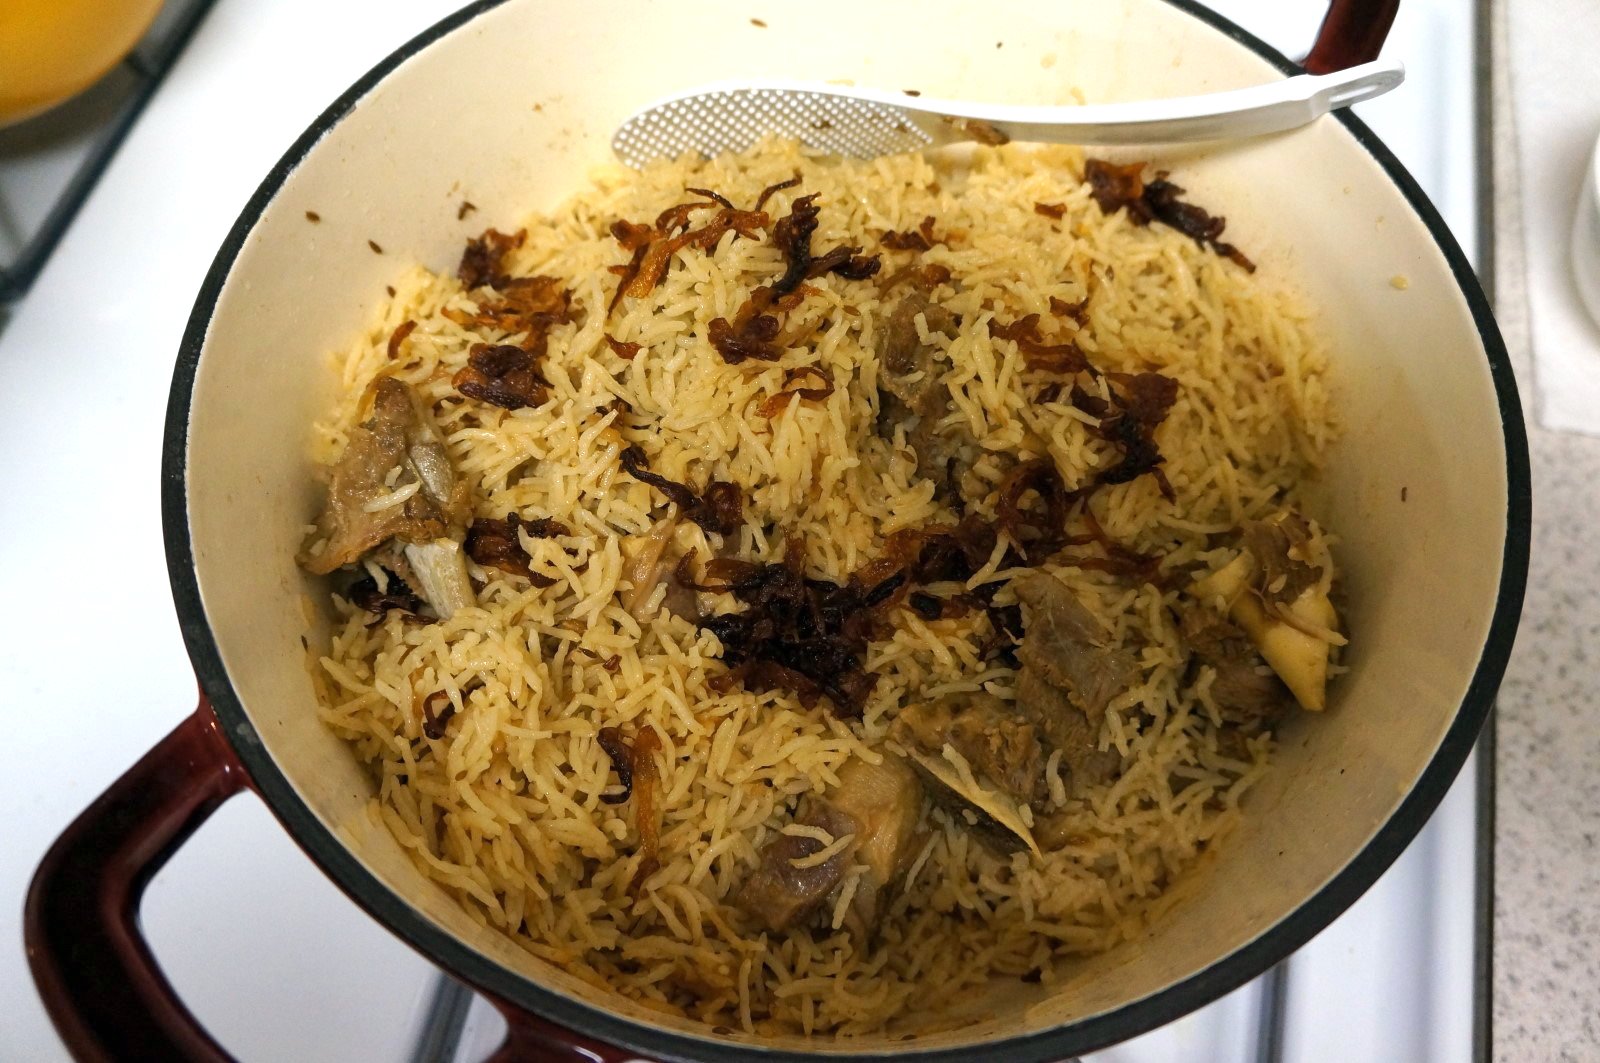
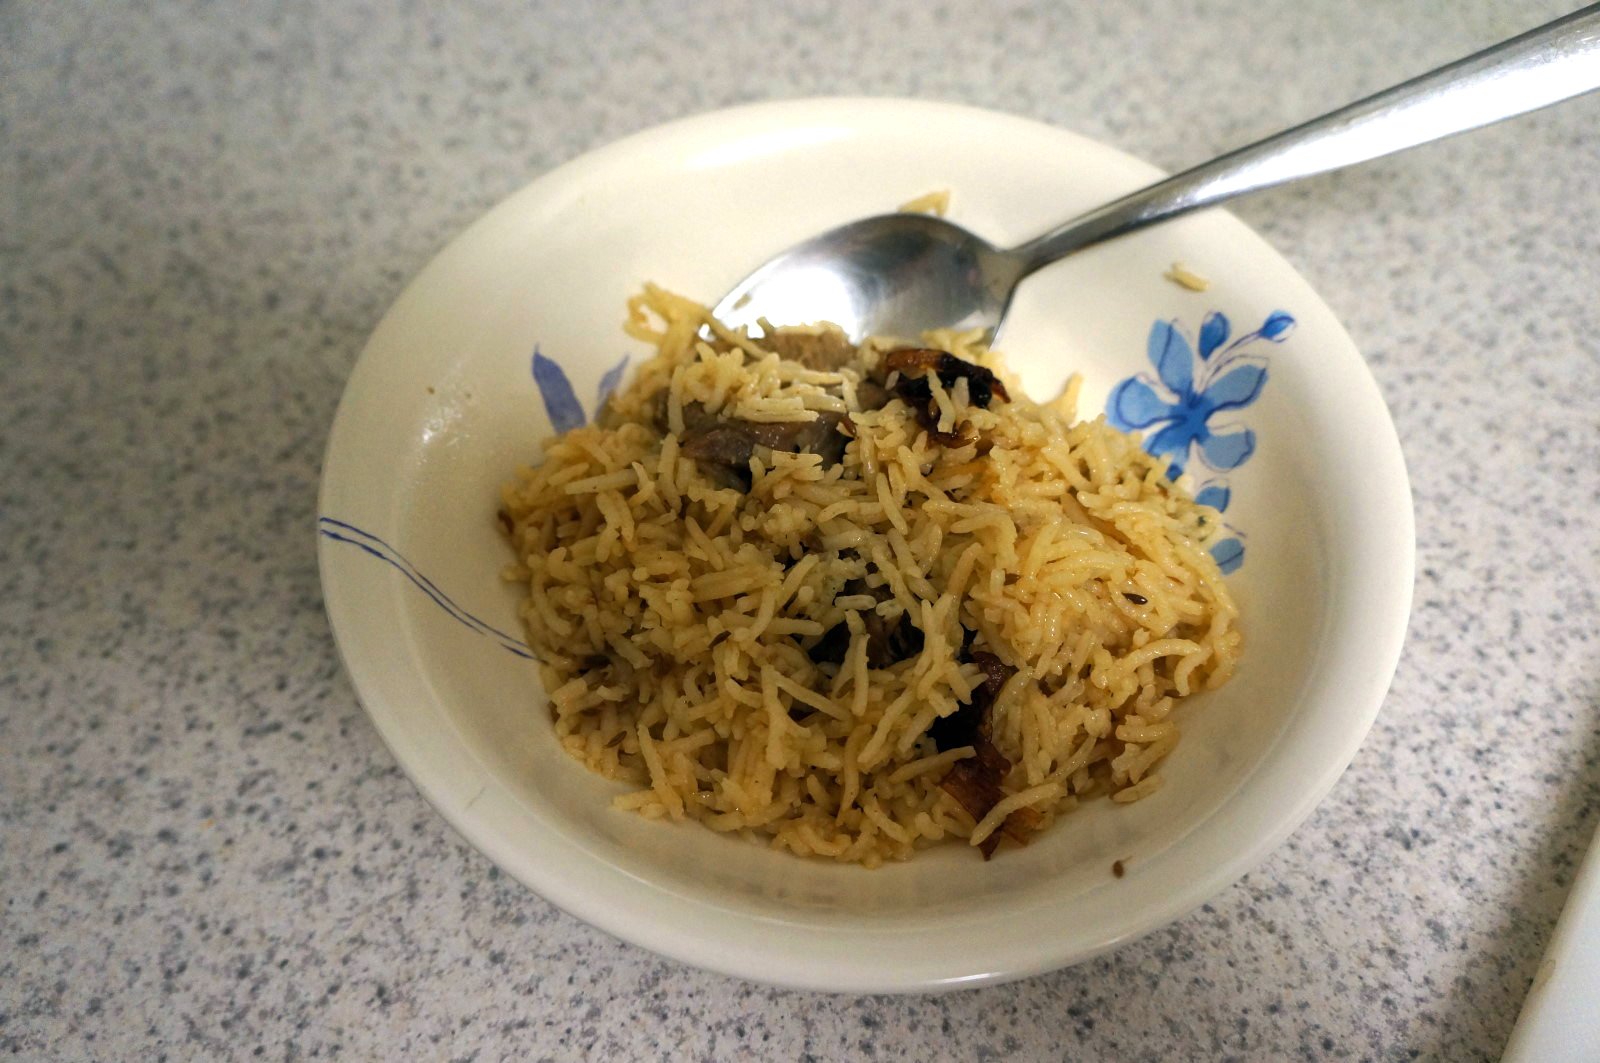
Showing posts with label main dish. Show all posts

Sunday, March 10, 2019

Instant Pot Methi Daal Gosht


Ingredients:

2 lbs medium bone-in goat botis, wash and marinade in pinch each of turmeric, red chile powder, and garam masala

From a bag of Indian frozen methi, remove 4 cubes (they are about the size of lemons), microwave for 4 minutes, allow to cool, and strain any remaining water content (press with fork or squeeze).

1/4 cup oil
 1 tsp whole cumin seed
1 onion finely sliced 
1 tbsp ginger-garlic paste
2 medium tomatoes pureed
1/4 tsp turmeric
2 tsp coriander powder
1 tsp cumin powder
1 tsp red chile powder (or to taste)
1 tsp salt or to taste
1/2 cup chana daal rinsed, keep soaking in water until ready
1.5 cups water

To finish:
Three fresh green chiles, whole
Pinch qasuri methi
Pinch garam masala
Pinch elaichi powder


Method: On Sautee mode, heat oil. Add in cumin seeds and onion. Fry onion until it is golden reddish brown. Stir in gg paste and allow to color. Stir in tomato puree, toss in dry spices, and stir until the oil separates and it is dried up a bit. When it looks dry, add in methi and fry for a few moments. Add in salt. Add in meat and mix well. Strain chana daal, then add it to the pot, stir in water. Cover and cook on bean/chili setting. Allow natural release. Open pot and mix well. Stir in finishing ingredients and allow to rest for a few moments. Serve with fresh roti or plain rice.

Friday, July 3, 2015

Fatima's Yakhni Pullao (Goat)

Fatima’s Yakhni Pullao

Yakhni pullao ready to serve for large gathering.


Yakhni means broth. This pullao is cooked in a golden, collagen rich, fatty goat broth. It is one of my husband's favorite dishes in my repertoire, and I like it a lot, too. It is not chile-hot at all. It's a great weekend dish for the family, but it's also a good fancy dish for a party because it shows "mehmaan nawaazi" that you are serving a lot of meat and high quality basmati rice. A deep stock is enriched by the addition of nalli, or bone marrow. 

*Take note that most of the pics I've added are from a day when I made this pullao for a daawat/party, but I'm giving a family sized recipe. That is why there are greater portions of ingredients than what I specify in the instructions. That day, I used a whole goat shoulder for my iftar party, 7 cups of rice, and 14 cups of yakhni.

The meat: Get about 2 pounds of goat meat, bone-in in medium botis (roughly 2-3 inch cube-ish size). Shoulder and chop pieces preferred. Ask butcher for about a pound of extra goat bones in a separate bag, especially nalli (marrow) bones, and trotters.  Desi halal butchers usually keep bags of this frozen. If you have a knowledgeable butcher, just ask for small to medium pullao cut pieces. If the pieces are too small, they will break apart when cooked.

On the left are the extra bones, on the right is a full shoulder with chops. I have washed this meat in my (spotlessly clean) kitchen sink.


For the yakhni (yields about 10 or so cups of stock)

Ingredients:

water to cover meat and bones in pot
1 onion peeled and cut in two halves
15 cloves garlic
about 5 inches of ginger chopped into large chunks (no need to peel, but wash well)
3 tbs whole garam masalas (I buy a bag of mixed whole garam masala, I think Deep brand)
make sure to get a couple of pieces of cassia bark, bay leaves, bari elaichi, and choti elaichi in the mix which will mainly be tiny pods of dhaniya, saunf, zeera, laung, and kali mirch. My mix also has star anise and mace (javitri).
2 whole dried red chiles
salt


Method:

Wash meat/bones well. Add to deep stock pot. Add water till the water just covers the meat. Too much water makes a weak stock.

Allow the water to come to a boil. Skim the scum that rises to the top a few times. When you have gotten most of the scum, add in all aromatics and sabit garam masala, and chile pods.

Scum to be skimmed off of the top of the broth before the seasonings are added.

Cover, lower heat to the lowest flame, and simmer for 1 hour and 15-30 mins till meat is very tender but not completely falling apart, and nalli looks loose from bones. My meat here in VA takes 1.5 hours to soften or “gallofy,” but in other places it only took 1 hour to 1.25 hours so use your best judgment on the timing. You don’t want the meat hard and spongy, you don’t want it shredding apart bc you still have to cook the rice and meat together.

About 5 mins before meat is done, add a large amount of salt to the stock. This will flavor the meat. You will still need more salt once the rice process begins.

Strain yakhni and keep the solids aside and allow them to cool. When cool, pick out all of the good meat pieces and keep aside. Now take a Japanese or Korean chopstick, which has a very thin pointy end (or similar thin pronged instrument, unused earwax cleaner, I dunno what else…linking pics so you get the idea of what to use) and use it to gently nudge the nalli out of the bones. Add nalli globules to stock. If you cook meat for a long time, the nalli will fall out on its own, but that would be too long a stage to cook the botis, so better to cook it till it is soft but still needs to be scooped or tapped out.

So you have your nalli floating in stock, and your good meat kept aside. Now throw away all of the spices and aromatics because they have done their job. You can keep a little of the tezpatta and cinnamon for looks if you like.


For the rice:
I use India Gate (Classic) brand rice. You should use your judgment for typical soaking and cooking time requirements of your preferred basmati rice brand. Don't use sella rice or any low grade of basmati. Three cups of raw rice to 6 cups stock will be needed. A 1:2  cup rice:stock ratio is used no matter the size of the pullao.

Ingredients:

3 cups basmati rice rinsed well and soaked for approximately 10 minutes (will be strained shortly before adding to the boiling stock)
6 cups stock
salt to taste (about 2.5 tsps or more…use more salt than you think you need)
1 tsp red chile powder
1 tsp zeera seeds whole
1 tsp ground zeera
¼ cup oil (same oil for frying finely sliced onions is ideal, I always keep it in a glass jar)
your boiled meat botis, cool and dry
1 tbs fresh lemon juice
1 tsp ghee or butter for basting the serving dish


Method: 

In a pot with a tight fitting lid: Add oil and zeera, when it sizzles, toss in meat and brown for a couple of minutes. Be gentle so it doesn’t break apart too much. The browning gives flavor but it is already cooked as much as it needs to be.

Toss in ½ o f the fried onions and allow to sizzle for a moment, these are red-brown fried so take care not to blacken them as they are already darkly fried.

Toss in ground spices, allow to sizzle. Before this burns, pour in all of the stock. Allow to come to a boil.

When stock is boiling, add in pre-soaked rice.

Allow stock to come to a boil again. Stir in lemon juice.

All should be bubbling and boiling along nicely. Now, cover and reduce flame to lowest point. Cook for 20 mins covered. After 20 mins, lift lid and allow some steam to escape and turn off flame. Re-cover and allow rice to rest for 10 mins. Resting the rice helps grains stay long and not break apart, as basmati is sensitive.


You will pour this into a large serving dish. I usually butter a deep serving dish like a lasagna pan or turkey broiler pan. Ghee also works well if you prefer that to butter. Before you start the transfer of vessels, put your remaining fried onions in the microwave for about 30 seconds to wake up the flavors. Pour pullao in layers adding a few sprinkles of the fried onion slivers between the layers, adding a final bit on the top layer for looks. Take care not to break the rice, be gentle.

Serve with plain yoghurt, lemon wedges, and if desired, a mild raita.

Left over yakhni can be frozen and used for a plain pullao or as the liquid in gravy. 


A smaller pullao made on a different day.

Rice grains lengthen like noodles and are very tender but separate. 


Thursday, September 4, 2014

Easy Jalfrezi


Jalfrezi is likely a Raj era invention from Bengal side that has morphed into a dish that appears in many interpretations.

For some, it is Indo-Chinese and requires stock powder, corn starch, and soy sauce. For others, it is a protein like paneer or chicken plus a medley of vegetables. Some like it fairly dry, and others like it in a wet tomatoey gravy. Some people use ketchup in their recipe, and in some restaurant style recipes it is creamy.

However it is made, the common factor in chicken jalfrezi seems to be that it must have bell peppers (aka capsicum) in it. Some people also like onions cut into petals in it. I am not a huge fan of lightly cooked onions, so I don't add those. Here is my very simple and easy version. For this you will need a curry powder type mix like Shan Curry Powder or a Kitchen King Masala. I use MDH Kitchen King Masala.

This recipe is as simple as a daily dish in method, but yields a bell pepper-chicken curry that is unique enough to serve at a party. The soy sauce adds an extra layer of flavor.

1 small organic chicken skinless and cut into karhai pieces (bone in)
1/4 cup oil
4 fresh green chiles, slit but intact
1 small onion diced
1 tsp garlic paste
1 tsp ginger paste
1/4 tsp turmeric
1/2 tsp red chile powder
1 tsp ground cumin powder
1 heaped tsp ground coriander powder
2 medium tomatoes roughly pureed
1 tsp MDH Kitchen King Masala
1 tsp salt or to taste
1/2 tsp soy sauce
one and a half cups bell pepper cut into petals (1/2 inch square pieces)...the number of peppers depends on how large they are. About 3 small or 1.5 of those giant ones.
1/4 cup chopped cilantro for garnish

Method: Heat oil in pan. Add in slit green chiles and allow them to fry for a few moments until they start to slightly soften. Remove with tongs or a slotted ladle. Keep aside to use as garnish at the end of cooking. Add the chopped onion to the oil. Cook this until it is turning golden, then add in the ginger and garlic. Cook this until the ginger and garlic also turn golden. Now add in the turmeric, red chile, cumin, and coriander powder. Allow this to sizzle for a moment, then stir in the tomato. Stir the tomato-masala a bit until most of the water has evaporated from it and the oil has risen to the top of it. Now add in the salt, soy sauce, and MDH Kitchen King Masala. Mix in the chicken and stir well until the chicken has completely changed color and is no longer raw looking. Now cover the pot, turn the flame to the lowest setting, and cook about 10-20 minutes until the chicken is just completely done. You shouldn't need to add water because they chicken will release water as it cooks. If needed, add very little water. When the chicken has just reached the point of being done, add in your bell pepper petals and turn up the heat. Stir for a moment, then lower the heat, cover, and cook for 5 more minutes. You want the bell peppers to cook through but retain a gentle amount of crunch and good color. Now stir in 3/4 of your fresh cilantro. Pour into a serving dish and garnish with remaining cilantro and with the four fried slit green chiles.

Serve with white basmati rice or even Chinese style stir fried rice.


Friday, June 20, 2014

Vegetarian Haleem


Haleem replete with garnishes


*Can be made vegan by omitting the yoghurt

Haleem can be made with beef, chicken, or goat. But what about a vegetarian version? Here I have created one. This is not a low fat dish. It is rich and heavy due to all of the nuts, seeds, and oil. Vegetarians will enjoy this veg version of this classic dish which is eaten in many Muslim communities, but those who are used to rich, meaty versions of haleem will also enjoy this recipe.

For this you need a box of Shan Shahi Haleem. This box will contain a packet of lentils/grains and a packet of ground spices. For those of you who have not used Shahi haleem mix, this makes a HUGE amount of haleem. Since this is a labor intensive recipe with a lot of steps, I usually freeze half of the batch of haleem, or even divide it into thirds and freeze it. That way you can enjoy haleem without having to do the work every time. Alternatively, you can half the recipe.

Open packet of Shan Shahi Haleem lentil/grain mixture. Optionally, and 1/2 cup extra pearl barley. I do this because I like the chewy texture of the barley in the haleem. Wash the lentils/grains well and soak overnight.

So you need:
1 box Shahi Haleem Mix (take care not to accidentally buy the Shan Easy Cook Haleem)
1/2 cup pearl barley

Making the Masala Yakhni

To cook them make a vegetarian masala yakhni. You will need 10 cups of water. (I make this in two sessions in a glass bowl in the microwave, rather than all at once.) To the water you will add:

2-3 tbs medley of whole garam masalas. I buy a bag of mixed whole garam masalas, but if you need to assemble your own medley----a few bay leaves, pieces of cinnamon bark, a few cardamom pods, 1-2 black cardamom pods, whole coriander, cumin, fennel, cloves, black pepper, a tiny bit of nutmeg and mace, 5 dried red chiles.

Optionally, you can add Hyderabadi potli masalas. Don't worry about this if you don't have it. It just adds an extra level of flavor, but this is already a flavorful dish with lots of masala. I ordered my potli masalas online, but if you live in an area with a lot of Hyderabadi Muslims, the Indian/Pakistani store will have some of these masalay, and some ingredients will be in the ayurvedic section of an Indian grocery.

1 tbs stone flowers (pathar ka phool)
1/2 cup dried rose petals (sukhe gulab ke sej)
a 3 inch chunk of dried root of betel plant  (paan ki jar)
1 tbs all spice (kabab chini)
1 tbs naag kesar (I have no idea what word exists for this in English) 
1 tbs kapoor kachri """"
1tbs dried Vetevier roots (khas ki jar)
3 pieces pipli (long black pepper corn, piper longum)

In a large microwave safe bowl, add these masalas in 5 cups of water. Microwave for 6 minutes. Strain the water twice (use a fine sieve) and keep aside. Repeat with the same wet spices. Once you've microwaved and strained the spices in water twice, you can toss them out. They have done their job. You will end up with brown colored masala water. 

Optionally, you can boil the water and spices together on the stove top for 10 minutes. The result is called a yakhni, or broth.

The Lentils/Grains

Cook the soaked lentils/grains in the masala yakhni that you have made. This can be done by boiling and then covering on simmer for about 1 hour, pressure cooking (in 2 split batches), or even left overnight in a crockpot. Add 1/4 tsp turmeric to lentils/grains as they cook. You can add 3-5 green chiles to the lentils when you boil them to make it extra spicy. But don't add salt unless you are cooking in a pressure cooker.  Otherwise add salt after the lentils/grains are completely cooked. You need about 2 tbs salt. (This is going to end up being a huge pot of haleem, but you can split the recipe in half if you use half the Shan lentils.)

Keep the cooked lentils aside in the vessel in which you want to finish the dish (large pot, crockpot, etc). You will have a bunch of cooked lentils in starchy water. Take care that the pot you use have room to add more ingredients because you will be adding your vegetables and spice paste and you don't want overflow or difficulty in pureeing later.

The Vegetables

For the vegetables which will be cauliflower and eggplant. You can really use any vegetable but avoid veg that will give the haleem a strange color. Haleem varies in color from khaki tan to yellowish to golden brown...so no large quantities of green or orange veg.

Chop one medium head of cauliflower in florets and deep fry them until tender. The cauliflower does not have to be completely cooked from frying because it will cook further when you add it to the haleem.

Roast 2 large eggplants in the oven. Do this by stabbing them a few times with a knife, coating lightly in oil, and wrapping in foil, then baking on a foil covered tray at 400 degrees for 1 hour and 20 mins. When the eggplant cools, skin it and remove the seeds and keep aside.


The Spice Paste

For the masala:

1 whole packet Shan shahi haleem masala spice.
1 heaping tbs garam masala
1/4 heaping cup almonds
1/4 heaping cup cashews
2 tsp roasted ground white poppy seed (khashkhaash or khas khas)
3 tbs roasted sesame seeds
1/2 cup shredded coconut, browned (I use frozen Indian coconut from the desi store and toast it in the oven)
1/2 cup fresh mint leaves
5 fresh green chiles
3 tbs Greek yoghurt, whipped
pinch of salt
3/4 loosely packed cup of red fried onions/birishta (linked instructions for making birishta)
1 cup oil (best if you have oil from frying the birishta)
2 tbs ginger/garlic paste

Soak the cashews and almonds in warm water for 1+ hours. In a blender add the nuts and soaking water. Add the fried onion, sesame seeds, coconut, and green chiles, and pinch of salt. Grind, adding a little more water as necessary.

Heat  the cup of oil in pan. Fry the ginger garlic paste. When this looks golden, stir in the masala paste. Fry this for 5 minutes. Add in the mint leaves. Turn off the heat and add in the yoghurt. Keep stirring until the oil starts to rise to the top of the mixture again. (Turning off the heat and stirring like this prevents the yoghurt from splitting.) VEGANS: just omit the yoghurt. Turn the heat back on and keep stirring, frying for 5 more minutes. Add in the roasted poppy seed and the full packet of Shan Masala (use less for less spicy) and stir for 1 more minute. Turn off flame and stir in garam masala. You should have an oily, spicy mixture.

Blending


Take out 1.5 cups of cooked haleem lentils grains + liquid and keep aside. This will be added back to the pot after you have pureed the rest of the haleem to give some chewy, grainy texture to the dish because of the pearl barley. Some people like a pure paste with no texture, so you can skip this if you want. I like the texture of some pearl barley in the haleem.

Add the vegetables and spice paste into the grains/lentils. Puree well with a stick blender. (This can be done well in a blender, too. That's just more work.) Add back in the un-pureed lentils/grains. Allow this to cook on low for a while so the flavors blend well. You can add water to get the consistency you like. Some people prefer haleem like a thick daal, others like a thicker paste. It shouldn't be too liquidy or too thick, though. If you add water, be sure to taste for salt. You've added a lot of salt but this is a huge degchi/pot of haleem, so check the salt. I think based on the recipe I have given that I usually add 1 cup to 1.5 cups water towards the end to achieve the consistency that I like.

Cook on low for 20 mins or so to let the flavors blend well.

Finishing with a baghaar

2-3 tbs oil
3 tbs birishta/brown fried onions

Lastly, give a baghaar/tarka of oil and birishta/fried onions. Use about 2-3 tbs oil and 3 tbs brown fried onions. Take care not to burn the already fried onions in the oil. Rather than just tossing the pre-fried onions into the haleem, awakens their caramelized sweetness and flavor. Pour this hot oil-onion tempering on the haleem. You may stir in the baghaar or leave it showing on the top, as per your preference.

Oila. You have vegetarian haleem!

Optional: Traditionally, haleem was made over a wood fire. Haleem cooked this way has a special smoky flavor. To replicate this and make your haleem extra fancy, add a "dhungar" (smokey flavor) by heating a small piece of coal on the stove, then placing the hot coal in oil inside of a little metal katori/dish to the haleem, and covering the pot so it can get smoked for 20 minutes. Then pour in some of the oil from the dhungar and mix well. Be sure to use pure charcoal and not a chemical filled briquette. This blog has instructions with pics on giving dhungar...there are also some youtube vids on it if you search.


Don't forget the garnishes! 

fried cashews, matchstick ginger shards, finely chopped green chiles, fried onions (birishta), fresh chopped cilantro, a tiny squeeze of lemon juice, and optionally, some chaat masala. This haleem is rich and spicy, so you may not want the chaat masala, though.

You'll have to prepare a small amount of these garnishes and set them on a platter next to your haleem as your serve it for each diner to add to their own dish.

Serve with naan.


*This dish is rich and fattening. You've used more than a cup of oil plus all kinds of fatty nuts and seeds. But this is a large batch of haleem, so don't worry too much. You can likely get 20 or more cup sized servings out of this recipe.


Tuesday, August 13, 2013

Aloo Chholay Chickpea and Potato Curry


This is a #whattodowithShanMasala recipe, meaning that it is required that you have Shan Chana Masala Mix (or your channa masala brand of choice) to make this recipe.

Alu chholay, a classic dish of Punjab. Serve this with roti, or even puris or kulchay. Make it thick or liquidy as per your taste, and if it has a wetter gravy, enjoy it with rice.

You may be wondering why Shan labels their mix chana (also spelled channa), but some people call this legume chhola (plural chholay). Chhola is the Punjabi word. This is what we call in English chickpea or garbanzo bean. To distinguish from the indigenous strain of desi chickpea, the channa daal with it's black outer skin, many people also call the larger, non-indigenous garbanzo Kabuli channa (channa from Kabul, Afghanistan) or safaid channa (white chickpeas).


Step one: Preparing the chholay

Chholay are best prepared in a pressure cooker, but can also be boiled in a regular pot. You will need:

1.5 cups of dried chickpeas
pinch of baking soda
1 black tea bag
1/2 tsp salt
water

Put your dried chickpeas in a deep bowl and wash them well. Cover them in double their amount of water. They will swell and grow as they rehydrate, so you want to make sure that they are in a deep enough amount of water. Add in 1 pinch of baking soda. This helps them soften when they soak and cook. Soak these at least 5 hours, or overnight.

When you are ready to prepare the chickpeas, strain them from the water. Never boil legumes in the water in which they have soaked, as all of the gas causing properties of the legumes will be in the water. It should be discarded (or used to water the plants or something). Put chickpeas in a pressure cooker with double the amount of water of the chickpeas. Add in the black tea bag and the salt. Cover and pressure cook them for about 25 minutes. In my Hawkins, it takes about 8 whistles and then low simmer for 10 minutes. Your pressure cooker cook time may vary.

When done, the chickpeas should be beautifully tender. Keep them aside with their cooking liquid, and discard the tea bag, which should have done its job of coloring the chholay. You will need the chickpeas separately from the cooking liquid, so when you are ready to cook, have the chickpeas strained, and keep the cooking liquid in another vessel.

You can also soak the chickpeas overnight and boil them (no salt) on the stove top for 45 mins to an hour. Add the salt when they are soft. OR you can use canned chickpeas. Canned don't have the fluffy, soft texture of rehydrated boiled chickpeas, though. It's up to you.

Step 2: The masala

1/4 cup cooking oil
1 tsp cumin seeds
1 small onion chopped (lemon sized onion, or 1/2 American onion)
1 tbs garlic paste
1 tbs ginger paste
1 tsp red chile powder
1/4 tsp turmeric
1 tsp coriander powder
1 tsp cumin powder
1 cup roughly pureed tomatoes (or 2 medium tomatoes, finely chopped)
1 tbs Shan Chana Masala
3-4 small potatoes, peeled and chopped into bite sized cubes
1/2 tsp amchoor
1 tsp garam masala
salt to taste (+/- 1 tsp)


garnish:
chopped green chiles and chopped cilantro

Method:

Heat oil in pan. Add in cumin seeds and allow them to color. Add in onions. Cook onions until they are translucent and turning golden, and browning a little bit on the outside. Don't let them become too brown or your curry gravy will be sweet. Add in the garlic and ginger when the onions are golden. Allow the garlic and ginger to color, then toss in the red chile powder, turmeric, coriander powder, and cumin powder. Allow this to sizzle for a second. Add in the tomato puree. Cook for a few moments until the tomatoes dry up a bit and the oil rises out of the masala paste. Add in the salt, then toss in the chickpeas that you had kept aside. Stir these for a few moments. Now, add in the Shan Chana Masala and stir well. Then, add in 1 cup of the chickpea cooking liquid. Allow this to come to a boil. Add in the chopped potatoes. Bring to a boil again. Cover, turn the heat to low, and cook for 20-25 minutes until the potatoes are completely done. When the cooking is done, turn off the flame and stir in the garam masala and amchoor. Cover and let this rest for 5 full minutes. The liquid will thicken at this point. If you want a wetter gravy, add in 1/2 cup or so more water. Stir in some cilantro, and then add more cilantro and chopped green chiles on the top of the dish.


Wednesday, August 15, 2012

Dum Ka Qeema Smokey Keema

Smokey and delicious dum ka qeema
Here is my dum ka qeema recipe. I served this dish at an iftaar recently and a friend kept demanding that I give her the recipe. Since I wrote it down for her in an email, I decided to post it here on my food blog.

This recipe is adapted from Zubaida Tariq's Kitchen (p. 72)...I'd like to link that book, but oddly I cannot find the English version online. (I know I've seen it before!) I purchased the book in Pakistan years ago.

This dish is a favorite of mine, and it is so good that you end up eating more ground meat than you ever imagined you could consume in a single meal. It's something about the smokey flavor that makes you unable to stop indulging.

Ingredients
ground meat (beef or mutton, fatty is good)-2 lbs
yoghurt-1.5 cups whipped 
ginger/garlic paste-2 tbsp (one of each)
onion-1 (Already brown fried tali hui pyaaz)
mint-1/2 cup fresh leaves
green chile-4 (chopped roughly for grinding)
lemons-juice of 2 lemons, plus some lemon slices for garnish
unripe papaya (kacha papita) with ground with skin-2 tbs
khashkhaash (white poppyseed)-2tbsp roasted and ground
bhune hue channe (chilke wale)-2 tbsp roasted and ground to powder 
OR if you don't have it -2 tbp besan toasted in a pan
red chile powder-1 tbs
garam masala 2.5 tsp
black cumin (shahi zeera)-1/2 tsp
salt-1 tsp or to tasteoil-1/2 cup or so (maybe even 1 cup!)
1 cup water
plus 2-3 tbs more oil for dhungar


1 small piece of coal for giving dhungar

Garnish: fresh mint leaves, sliced raw onions (rings look especially nice), lemon wedges

Method:

Grind fried onions, gg paste, green chiles, mint, and juice of onelemon together. Mix this into the yoghurt. Add this into the meat and add in the khashkhaash, ground bhune hue channe/besan, 1 tsp red chilepowder, 2 tsp garam masala, and papaya. Mix well. Allow to rest forone hour. This will allow the meat to soften from the papaya. Don'tleave to marinade for more than one hour or the papaya will turn yourmeat to paste.


Heat oil in pan. Add in qeema and stir on high heat till the water dries up. This will take a long time. Like maybe 7-10 minutes. When it looks dry, add in salt and 1/2 cup water. Mix in, allow to come to a boil, then simmer covered for 15 minutes on low flame. Now turn up the flame and bhunofy it for 10 more minutes until it looks very brown. Sprinkle a little bit of water from the remaining half a cup you have to prevent any burning or sticking. You have to keep stirring and stirring and your arm will hurt, but when it is brown colored, it is done cooking. As long as it is well browned, you don't have to dry up any extra water you put in. It shouldn't be so extremely dry as to be crumbly, and should be tender. The ghee/oil as well as the water used at the end will keep this dish moist.


Giving dhungar (perfuming with smokey flavor): Now heat up your coal on the stove. When it is hot, make a cup out of silver foil (or use a cup made out of a single large onion petal) and put ghee or oil into that cup (2-3 tbs). Put the foil cup filled with oil into the pan with the cooked qeema. Place the hot coal into the oil and quickly cover. Allow the smoke that rises to penetrate the qeema for about 20 minutes or until the coal is cool.When the coal is cool, remove the foil and coal but pour the extra smokey oil into the qeema. Mix this oil into the qeema and also add in1/2 tsp more garam masala and 1/2 tsp shahi zeera. Before serving, stir in juice of one more lemon. (To prevent a house fire, take care to put the leftover burnt lump of coal in a cup of water for a while before disposing, and don't just throw it directly into the trashcan even if it seems completely cool.)


Top with garnishes and serve.

It is a fattening and arduous dish but very delicious. It is traditionally served with parathas, bhatooras, or puris. Naan works, too. It can also be rolled into paraathas along with sliced onions and tamarind chutney for dum ka qeema roll.


Variation:

Dum ke kabab

Use only 1 cup of yoghurt, but keep the rest of the ingredients the same. After one hour of marinading, do as follows: Do the dhungar process on the raw meat. Shape meat into hamburger patty shaped kababs or oval shapes, and pan fry in a little bit of oil on medium heat, nicely browning each side and cooking through thoroughly.

Friday, August 26, 2011

Landi Kotal Shinwari Style Karhai Chicken

Shinwari Karhai Chicken


In Pakistan and India there are endless recipes for varieties of karhai dishes. This particular recipe is a prototypical specimen of the karhai chicken of Khyber Pakhtoonkhwa, the 'original' karhai chicken. You will find this sort of karhai chicken or karhai gosht in Peshawar's Namak Mandi, and it is named along with meat tikka and kabaab as one of the famous dishes of the Pashtoon tribes of the entire Frontier region. This recipe in particular is based on the Landi Kotal style karhai of the Shinwari tribe of Pashtoons. It is known in Pakistan for being highly delicious while containing no ground dried spices besides black pepper. Green chiles and juicy ripe tomatoes give this dish its unique and clean flavor. It makes its appearance on Pakistani restaurant menus and in wedding catering as Shinwari karhai. I had this style of karhai in North West Pakistan, as well as at an open air Pashtoon restaurant in Karachi, and I have always been intrigued by its delicious simplicity. Recently, I had this style of karhai chicken at the DC Metro area's notoriously tasty Ravi Kabob restaurant. Though Ravi Kabob is owned by Punjabis and the cooks are all from Mexico and Central America, the taste of their karhai chicken is exactly like what I remember eating in the Frontier restaurants. It's probably the best and most authentically Frontier style karhai chicken I have eaten outside of Pakistan. I felt inspired to do some deep research in attempt to replicate what I had eaten there and in Pakistan. Here is what I have come up with. My husband says it tastes spot on like Frontier style karhai, and he insists that it is even better than Ravi Kabob's famous karhai chicken.


1 chicken, skinless, bone-in cut into 2 inch pieces (ask for karhai cut from halal desi butcher)
5-6 whole green chiles, slit
1 tbs ginger-garlic paste
2-3 tomatoes roughly pureed
2 tomatoes cut into medium chunks
1 tsp salt or to taste-should be nicely salted
1/2 tsp black pepper
1 tbs lime juice
1 tbs ginger cut into long thin slivers ( finely julienned)
1/2 cup cilantro chopped
1/2 cup or so oil (traditionally this dish is made very rich with an excessive amount of oil)

In a karhai or deep cooking pot heat oil. Add slit green chiles and stir until they begin to color. Remove chiles from oil with a slotted spoon and set aside. Add in ginger-garlic paste. When this turns golden, add in chicken pieces. Stir on high heat, allowing chicken to brown a bit. When the chicken has got some color, add in the tomato puree. Add in the salt. Stir around for about five minutes, allowing the tomatoes to break down a bit and release their water, but not long enough for the water to dry up. Add in the tomato chunks, stir, and cover with a lid. Lower heat and allow chicken to cook for about 20-25 minutes, stirring occasionally. Once the chicken is cooked, turn up heat and stir for a few moments more, adding in the black pepper. Turn off the heat. You should have a semi-dry gravy laden with tomato chunks, with quite a bit of oil floating on top. The trick is to cook the chicken through while still leaving some rawness in the tomatoes so that they remain wet and red. They should not fully break down in the gravy and darken as in a typical 'curry.' Now, stir in your lime juice, half of your ginger shards, half of your cilantro, and all of your chiles. Garnish the top with the remaining ginger and cilantro.


*A lighter alternative: Although bone in meat is traditional for karhai chicken, for health purposes, this recipe can be adapted to use with chicken breasts cut into large cubes. (Say, 2 inch cubes, or to your preference.) The cooking time of the chicken will be significantly reduced, as it is important not to overcook boneless breast meat. This will affect the time allowed for the tomatoes to break down and dry up. To adapt, brown chicken breasts in the oil after adding ginger-garlic paste as described above. Next, stir in roughly pureed tomatoes and salt. Cover and cook for 10 minutes or so until your cubed chicken breast is fully cooked through. Using tongs, remove chicken breast cubes from the gravy and set aside. Now, allow the tomato gravy to cook down and dry out a bit more, about 10 minutes on medium heat with occasional stirring. You may need to use a splatter screen. When the gravy has dried up a bit but is still a bit wet and red, add in the tomato chunks. Allow this to cook for 5 minutes more, mashing the chunks down a little bit. When the gravy is of the correct consistency, turn up the heat and stir the chicken cubes back into the gravy. Add in the black pepper and proceed with the above recipe instructions, adding in the finishing touches on the dish.

Shinwari Karhai Chicken made with chicken breast

Serve with fresh hot naan.

Krazy for karhai?
For a Southern Pakistani interpretation of Frontier style karhai, see here.
For black peppercorn karhai, see here.

Saturday, April 9, 2011

Roghan Josh

Roghan Josh, also spelled Rogan josh, is a well known Kashmiri dish.  From Persian, "roghan" means ghee/oil/butter/fat and "josh" means like bubbling hot with excitement...so it is like "hot bubbling fat." What a fatilicious name!


There are a lot of roghan josh recipes on the internet. Most are faux Mughlai/Punjabi restaurant style recipes and contain cream and tomatoes, neither of which are found in Kashmiri Pandit or Waza Roghan Josh recipes. It is actually pretty hard to google up an authentic recipe without some digging and research. For some basic info on Kashmiri Pandit and Wazwan cuisines, see here.


I wanted to share two recipes for Roghan Josh that I acquired after a lot of hunting online. I have tried them both multiple times, and they are both good. One is a Pandit recipe, and the other a Muslim recipe.


The Pandit style recipe I found at the another subcontinent forums from poster Suman. (post #1) (The Another Subcontinent forums has a wealth of anecdotal South Asia food information, tips and recipes. Every once in a while I just sit there and read food threads for a hour.) 


Rogan Josh.


(somehow blogger is not letting me link above anymore so I linked the source here)

1 llb lamb, cut into small pieces
couple tblsp mustard oil or substitute.

4 cloves/laung
1" dalchini/cinnamon
2 black cardamom
couple small bay leaves

1/4 tsp hing
2 tsp saunf/fennel
1/2 tsp sonth/dry ginger powder
salt, chilly powder

4 powdered green cardamon
1/4 cup yogurt, beaten till smooth.

Saffron optional.

In the hot oil put in the whole spices(cloves, cinammon, cardamom, bay leaves) and stir for a few seconds till fragrant. Add the lamb and the hing and fry on fairly high heat until speckled with brown. This should take between 5 to eight minutes. Add the saunf, saunth, chilly powder, and salt and fry for a minute or so. It should be pretty fragrant by now.

Reduce the heat, add the beaten yogurt and powdered green cardamom and keep stirring till it comes to a boil. Add 1/2 cup of water, cover and cook till done. In LA the lamb takes about 30 minutes to cook, so adjust cooking time and the quantity of water.

Saffron can be added when done and simmered for a couple minutes more.

The resulting gravy should have body, should not be watery and is served with rice.

A green vege, stir fried with a tadka of a pinch each of hing and clove powder plus a whack of chilly goes very well with this.


I pretty much followed Suman's recipe to a T, but I used bone-in mutton and cooked for 1 and a half hours till tender, not 30 mins, I used sunflower oil (I don't like the taste of mustard oil), I powdered the saunf/fennel seeds and beat it in with the powdered cardamom, and I did not use saffron. It came out very nicely.


The second recipe was posted here by a Ms Princess W in the India Mike food section (post #55) by a US origin lady married to a Kashmiri Muslim and living in Indian Kashmir. At the time she posted, she was learning Kashmiri Muslim style cooking from her in-laws. I also recommend that you read through that entire thread as she and other posters share more information on Roghan Josh and Kashmiri cuisine.


Roghan Josh


(once again fickle blogger is ignoring my instructions to hyperlink above, so source is linked here)


1 kg lamb, bone in

1/2 to 1 cup Mustard Oil

3 Onions, sliced thin

3 cloves garlic

1 teaspoon minced ginger

1 1/2 cup plain curd, beaten to a liquid consistency

3 black cardamom pods

4 whole cloves

1" stick cinnamon

1 1/2 tsp salt

1 1/2 tsp red chili powder (if you want the red colour & more spice)

1 teaspoon turmeric powder

2 green chilis, minced

1 Tablespoon dried mint leaves

2 teaspoons fennel, ground (can use whole seeds if you prefer)

fresh coriander leaves, chopped


First, boil the lamb in a kettle of water seasoned with salt and one of the black cardamoms. Boil about 10 minutes and remove. Reserve water.

In pressure cooker, fry onions in oil until golden brown and somewhat crisp. Remove and grind the onions with the garlic and ginger to form a paste. Add cloves and minced chilis to the hot oil and fry about 30 seconds. Add lamb to the oil and brown just a little, then add the rest of the seasonings and about 2 cups of the reserved lamb broth. Place the cover on the pressure cooker and let it come to full pressure. After 3 or 4 "whistles", reduce heat and continue to cook for about 20 minutes. Remove from heat and let cooker cool naturally before opening.

Check the tenderess of the meat. If it comes off the bone easily, it is ready. Add the beaten curd to the pot and stir well. Let the Roghan Josh simmer on very low about 1/2 hour to blend the flavors, then let stand about 1 to 2 hours, or better yet, refrigerate, then heat n serve the next day, topped with the coriander leaves.


Here is my picture of the rendition of Ms Princess W's recipe.


 I used chaampen or mutton chops rather than botees as that is what I had on hand that day. Nice hot fat floating on the top, eh? And check out the red color! I did not pressure cook the lamb but cooked it stove top. Ms Princess W doesn't mention cockscomb here, but I also added paprika instead of more red chile powder to imitate the color of Kashmiri cockscomb flower, which obviously is hard to procure outside of Kashmir. Paprika is a good option instead of extra red chile powder since obviously the heat factor would be uncharacteristically amplified by extra chile. I also omitted the dried mint because I didn't have any. And just like with Suman's recipe, I forwent the traditional mustard oil simply because I am not a huge fan of the taste. It was a nice dish, and with the Kashmiri waza method of adding seasonings to a yakhni/broth and perfuming a dish with fennel, this dish was very distinct from my typical daily tamaatar-pyaaz Pakistani saalans.


I often create my own recipes by adapting and combining recipes from friends, in-laws, books and online, and altering methods and ingredients slightly to suit my taste and cooking style. Here you have two simple and authentic recipes that you can do the same with.

Monday, May 17, 2010

Shan ki Shan: Sindhi Biriani


Some people will tell you that using Shan Masala is cheating. I say no way. Using Shan masala is perfectly fine if the end result tastes good. Shan is an auxiliary item. It doesn't create the 'maza' for you. Besides, no one just uses the packet of Shan Masala. Everyone always adds in their own medley of spices to a couple of spoonfuls of Shan for a dish. I have a post in mind about the rise in popularity  of Shan's connection to the birth of modern Pakistani cuisine. Shan has contributed to the homogenization of a diverse food culture in the young nation of Pakistan.  But in this post, I'd like to share with you my recipe (with a little help from Shan Uncle) for Sindhi biriani. Many people swear by Shan's Sindhi biriani mix. I use it, too as my favorite biriani. Here is my doctored up Shan masalay ki Sindhi biriani recipe. I add mango powder and extra dried plums (aloo bukharay) to the Shan masala to get a hot and sour taste in the finished biriani. Using Shan doesn't make it a bit easier, it is a complicated process. But it turns out great:

For the meat gravy you need:
1/2 cup of oil (which will be poured off of the gravy later, don't worry)
1 kg (2.2 lbs) of bone in mutton cut in large chunks (say 2/2 inch botees)
1 tsp whole cumin seeds
2 onions finely sliced and fried until crisp and brown (bhuni hui pyaaz)
1 tbs garlic paste
2-3 tomatoes roughly pureed
1 heaping tbs salt
1 tbs ginger paste
1 cup yoghurt
1.5 tbs Shan Sindhi Biriani Masala Mix
1 tsp coriander powder
1 heaping tsp ground mango powder (aamchoor)
1 tsp red chile powder
1 tsp garam masala
+/- 1 cup water
12 alu bukharay (dried plums/prunes available at Pakistani grocery)


Aloo Bukhara


Method: Mix the yoghurt with the powdered spices and the ginger paste and set aside. Heat oil in a pot and brown meat in two batches. Set the meat aside. Add cumin seeds, fried onions, and garlic paste to the oil.  Take care not to burn the onions. When the garlic is golden, stir in the tomato puree. Stir this for a while until the water has evaporated from the tomato puree and the oil is rising to the top of the gravy. Add in the salt. Stir in the meat and mix well. Turn down the heat and stir in the spiced yoghurt (lowering the heat will prevent the yoghurt from splitting). Mix well and turn up the heat again. Stir until oil rises to the top of the gravy. Add in the water and the aloo bukharay. Allow to boil, cover, simmer on low heat for about 1.5 hours until the meat is nicely tender. When it is done, remove the meat and aloo bukharay from the gravy with a slotted spoon. Turn up the heat and evaporate the remaining water from the gravy. You will have a thick biriani masala paste. Pour the oil that rises to the top of this paste off of the gravy to cut calories and to avoid a greasy biriani (yuck!). Add the meat and the aloo bukhary back to the dry gravy paste and keep ready for the rice. *You can add potatoes to this recipe. Peel and halve 3-4 potatoes and add in in the last 40 minutes of the gravy's cooking. Remove the potatoes at the same time you remove the meat for drying up the gravy.


For the rice:
3 cups of uncooked biriani grade basmati rice cooked according to these instructions: Lucky Delicious on How to Cook Basmati Rice  parboiling method. You will soak and parboil the rice according the specifications for biriani rice. Do this after the biriani gravy is done cooking. You will layer the rice with the biriani gravy in a pot soon after you have finished parboiling it. Take care to be gentle with the rice so as not to break the kernals.


Unmixed layered biriani before covering to fully cook (put on dam)

Perfuming the biriani:

16 fresh mint leaves
8 fresh whole green chiles, slit
1/2 tsp Kewra Water (available at the Pakistani grocery -keora jal-)
1/8 tsp of orange biriani food coloring added to 1/2 cup milk


mint and chiles


Bush brand biriani coloring, coloring mixed in milk, keora water


What to do: You have parboiled your rice. You have made a biriani gravy. Take a vessel and use a paper towel to grease it lightly with ghee. Add in a layer of meat and gravy. Distribut half of the mint leaves on top of this, and throw in half of the slit chiles. Now add in half of the rice. On top of this, add in another layer of meat gravy. Top this with the rest of the mint leaves and slit green chiles. Then add another layer of rice. Drizzle the rice with the keora water. Pour the orange colored milk into one area of the biriani rice. Now cover with a kitchen towel and close the lid. Put this on a high flame for 3-4 minutes to start some steam going in the pot. Then turn down the heat to the lowest setting and allow this to cook for about 18 minutes to finish off the rice and to allow the gravy and rice flavors to blend together. This step is called cooking on 'dam'.


biriani cooked on dam in a Sindhi sipri


When the biriani is cooked, turn off the flame and lift the lid to allow some steam to escape. Allow the biriani to rest for at least 10 minutes before mixing and serving it. This allows the rice to settle so that it won't break when you stir it. After the biriani has had a nice rest and you are read to serve, mix gently and set out on a serving dish. Garnish with finally chopped cilantro. Serve with plain yoghurt.


Freshly cooked and mixed biriani